Get started (step by step)
In this tutorial, we use public scRNA-seq data derived from the developing mouse cerebral cortex at E14.5 (GSE123335) to show you how to get started with the spatial mapping tool, the key module implemented in STellaris. Prior to performing spatial mapping analysis, we have some preparatory work to do, including preparing input files, submitting a job, selecting a properly matched ST section and setting appropriate parameters for spatial mapping.
1. Prepare input files
To perform the spatial mapping analysis, users need to upload two files:
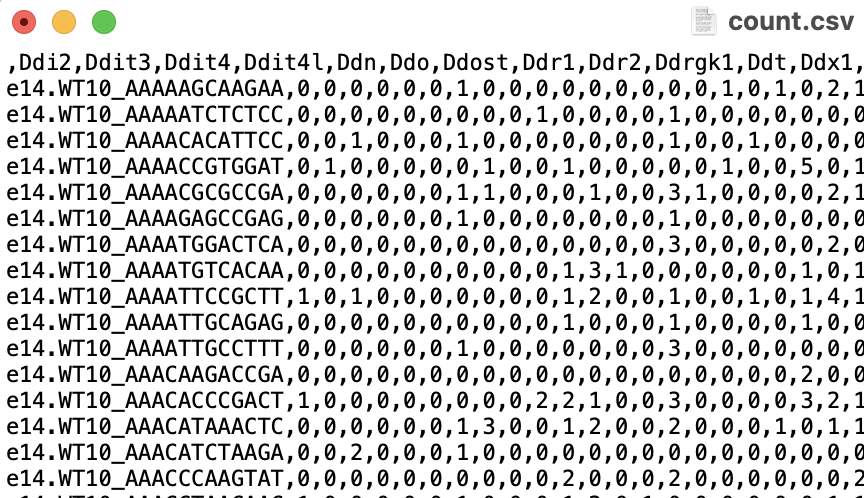
- 1) A cell-by-gene raw counts matrix file, where the column names are gene symbolsthe row names are unique cell IDs;
- 2) A cell type annotation file, where the first column contains the cell IDs in the same order as the count matrix, and one of the latter columns is labelled "cell_type" and contains categorical annotations, such as clusters, cell types, or cell states.
An appropriate raw count matrix file looks like:
An appropriate cell type annotation file looks like:

2. Submit a job
Go to the home page or Mapping page from the navigator bar, and submit a job following these steps:
Basic information
- Enter a title of your job in "Job Title" box (up to 80 characters).
- Optionally, enter an email address to receive progress notification for your project.
- Select ST sections that match your scRNA-seq data by specifying the species, organ and tissue. This step is crucial to ensure that only the ST sections that meet these criteria will be considered in subsequent analyses. Here we choose species "Mus musculus" for species, "Brain" for organ and "Brain" for tissue.
Data upload
- Click on the “Select a count matrix file” button and select a prepared count matrix file.
- Click on the “Select a label file” button to select a metadata file with cell type annotations.
- Click on the “Upload” button and wait for a second.

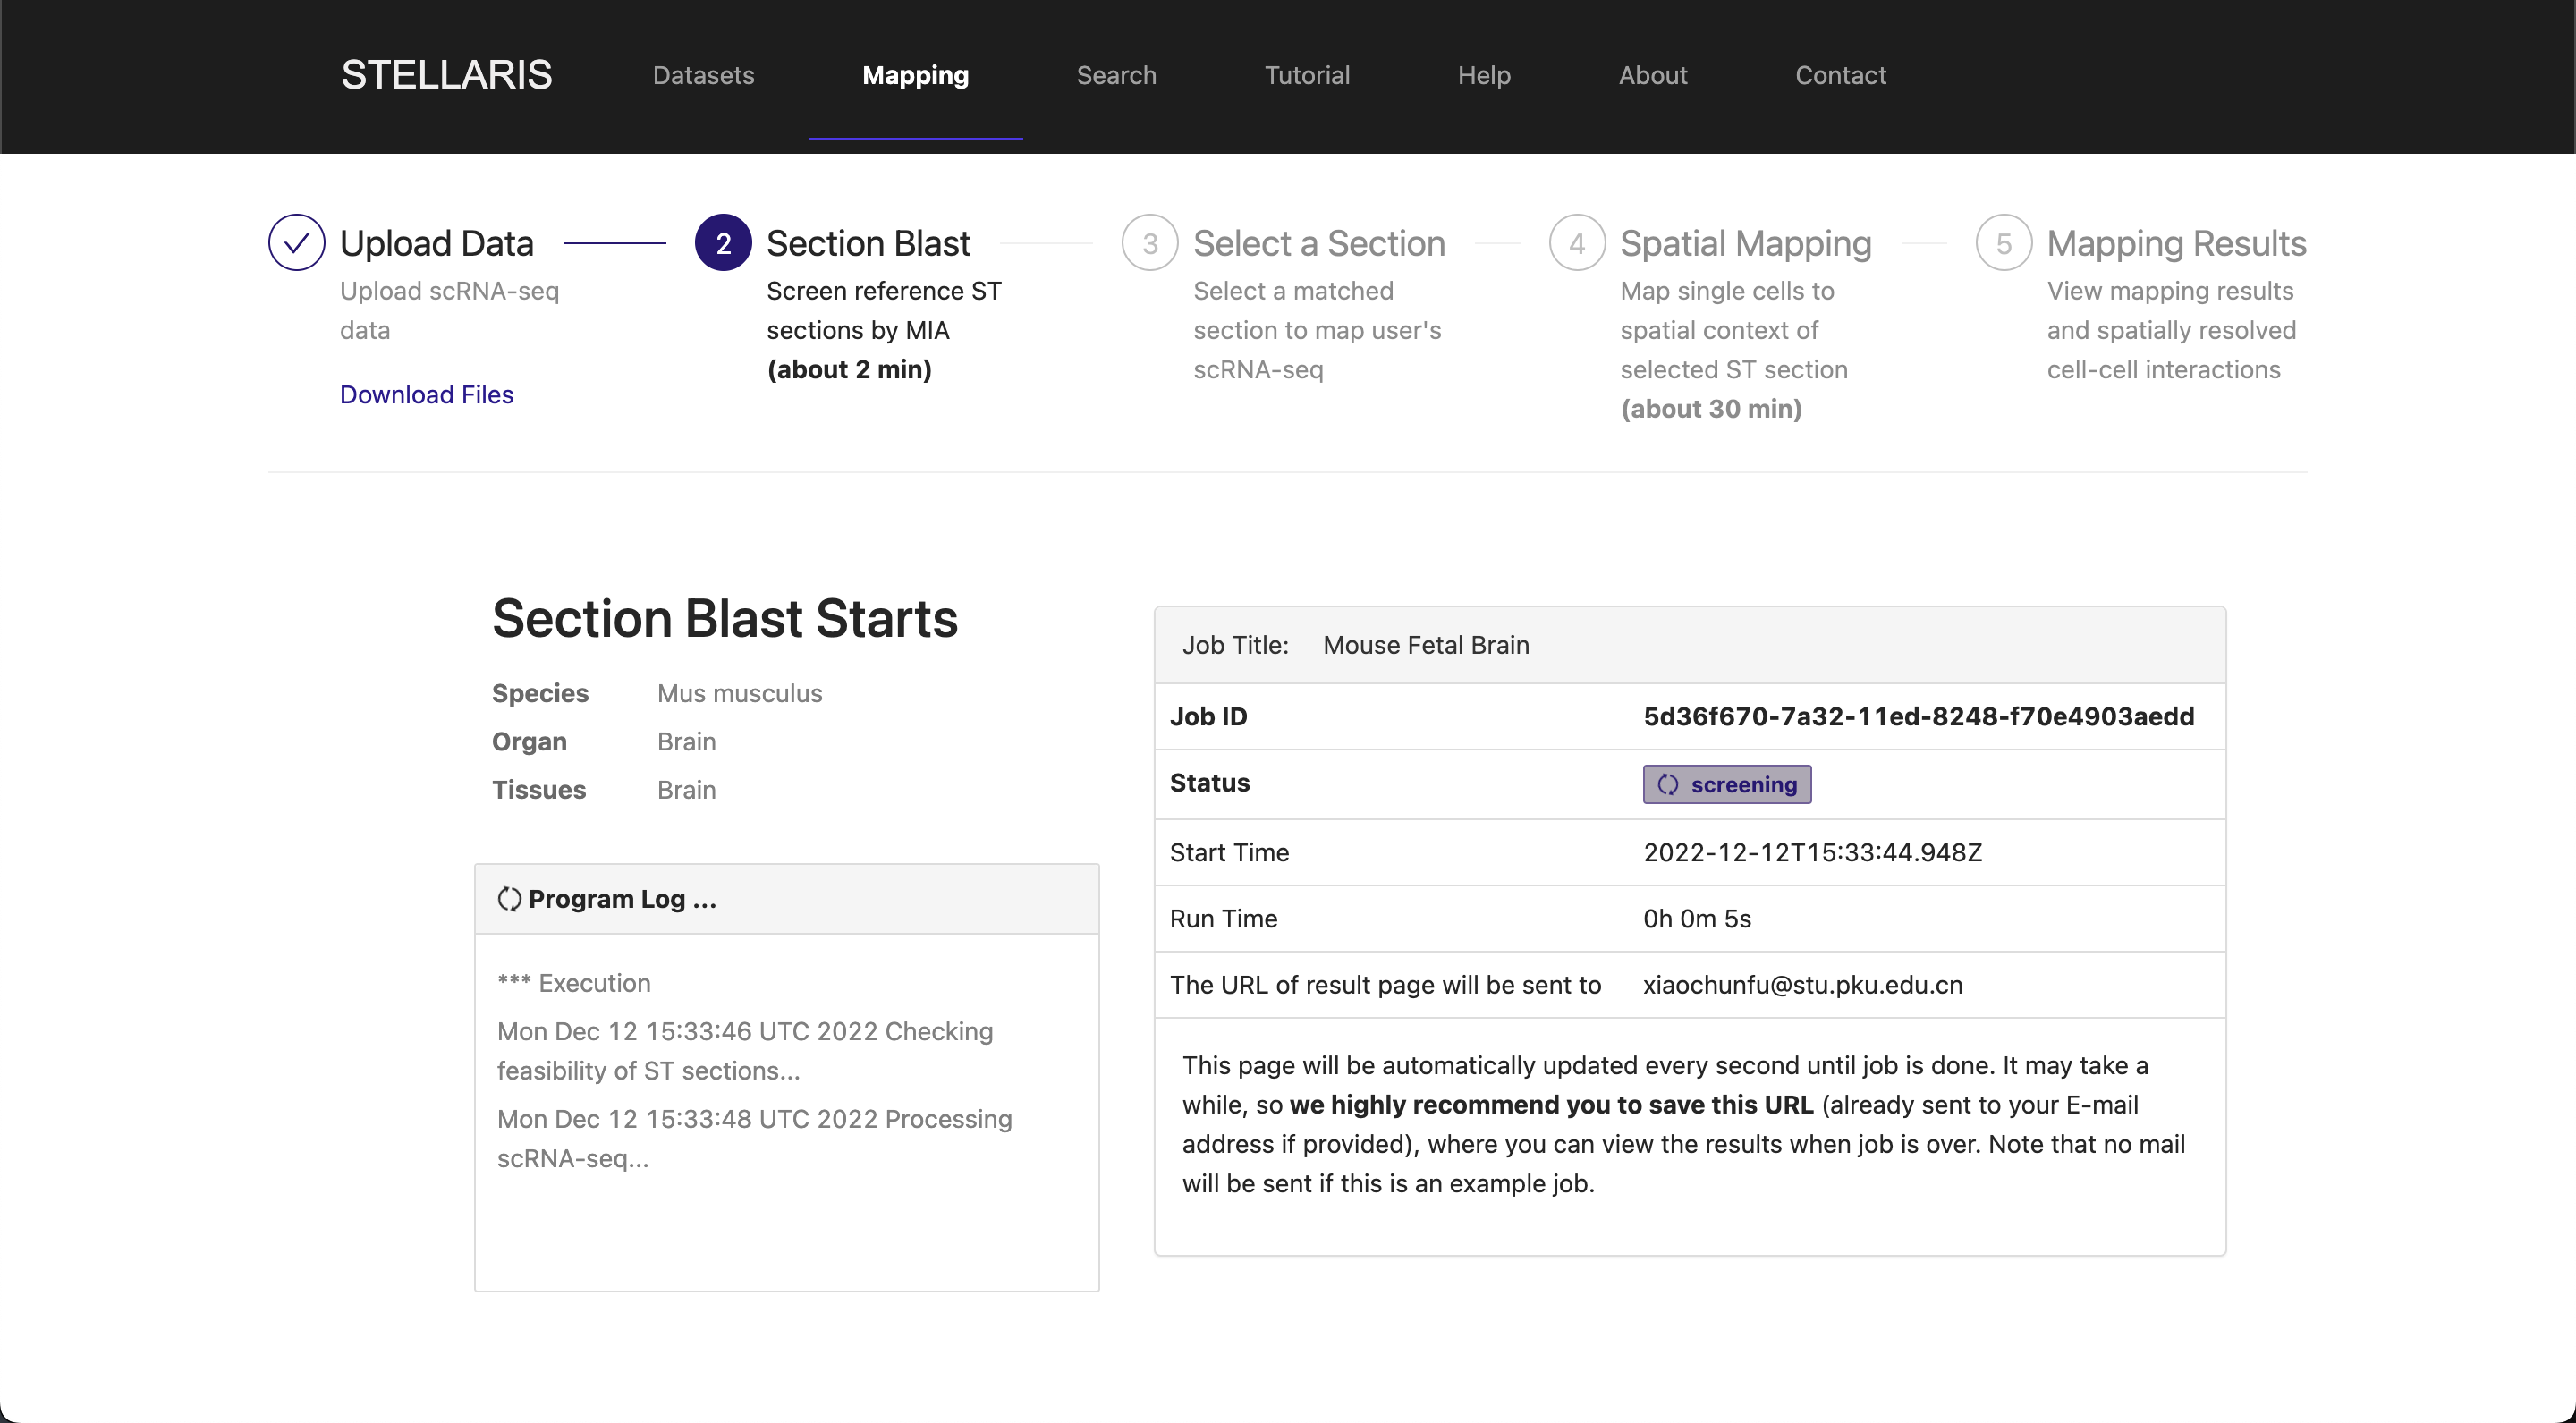
3. Section blast
After successfully uploading your scRNA-seq data, you will receive a confidential URL for your job request and be redirected to a running page. The next step called "Section Blast" will automatically start. This analysis aims to quickly screen out the ST section that properly matches your scRNA-seq data. See here for more details on this step. Section Blast is generally fast and should take about 2-3 minutes.
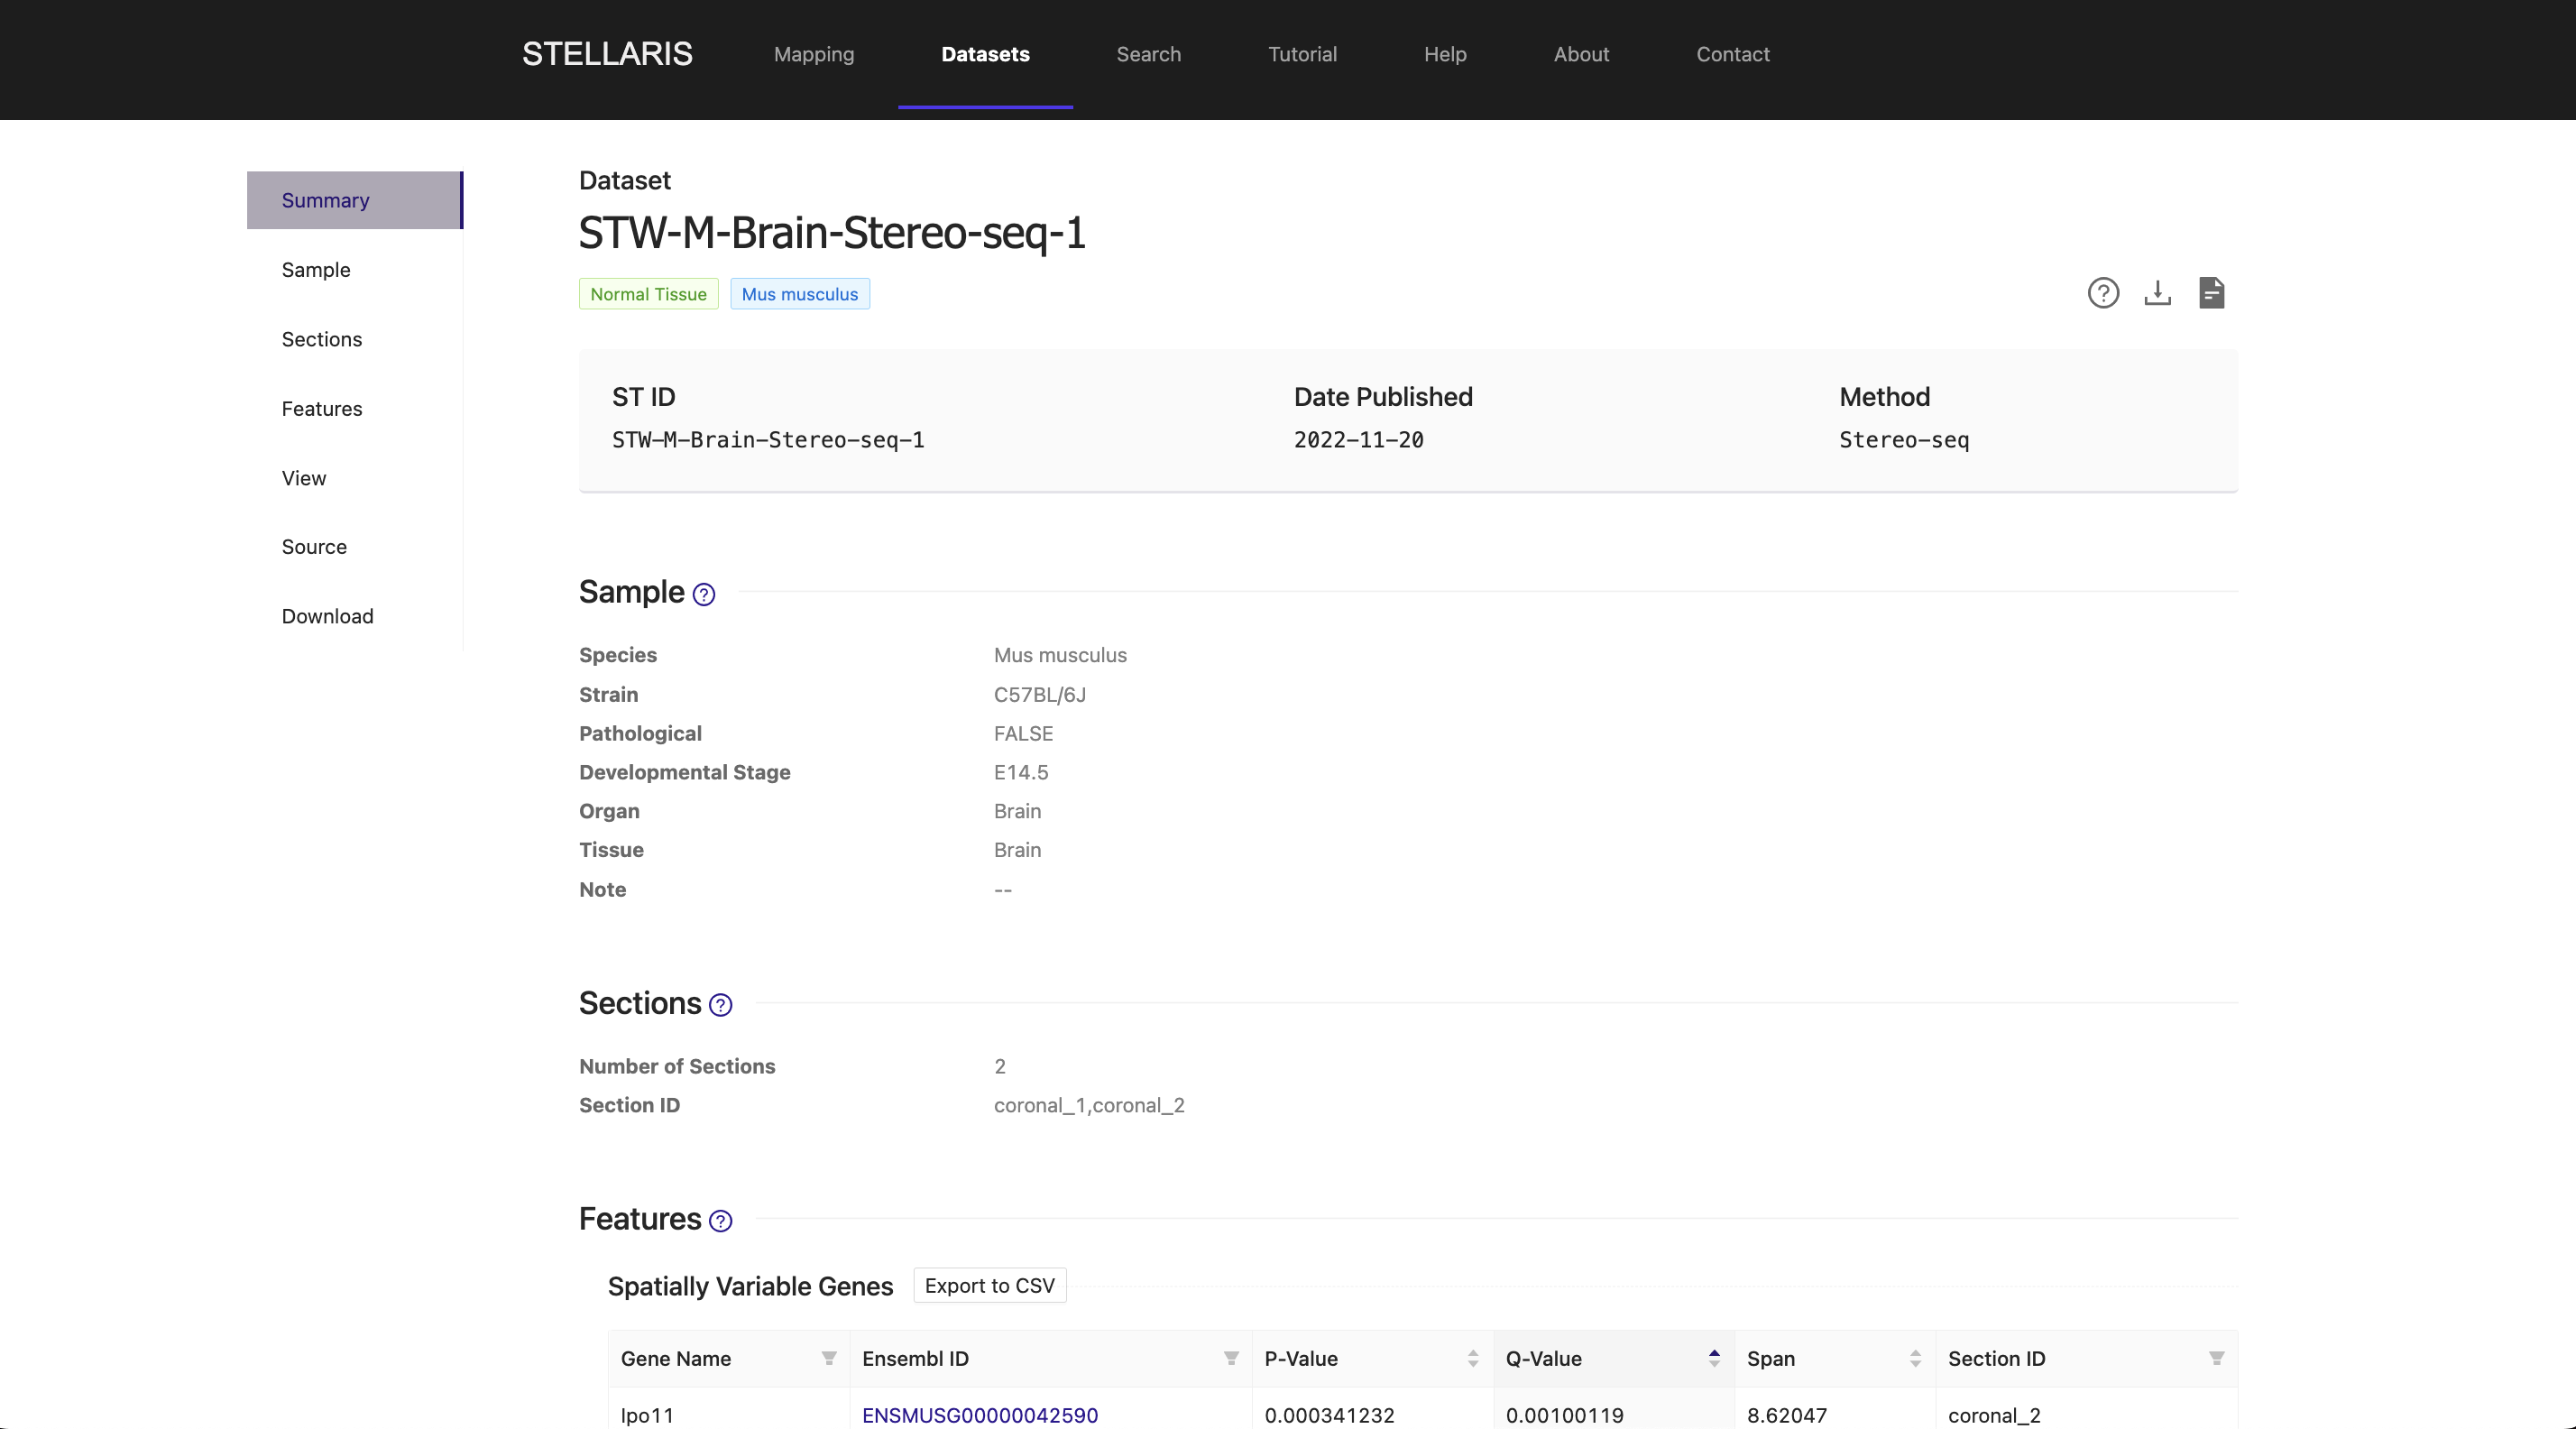
Once Section Blast is finished, the matching scores of ST sections will be returned in descending order. A table with additional attributes of the examined ST sections (104 sections in this example) will also be reported. To select the section to which you want to map, you can manipulate this table by reordering it by a certain feature or filtering some sections in the table header. You can also click the "ST ID" to navigate to the dataset browser of the ST dataset that you are interested in for further information. Once you have decided which ST section to use for spatial mapping, you can click the "select" button on the right to proceed.
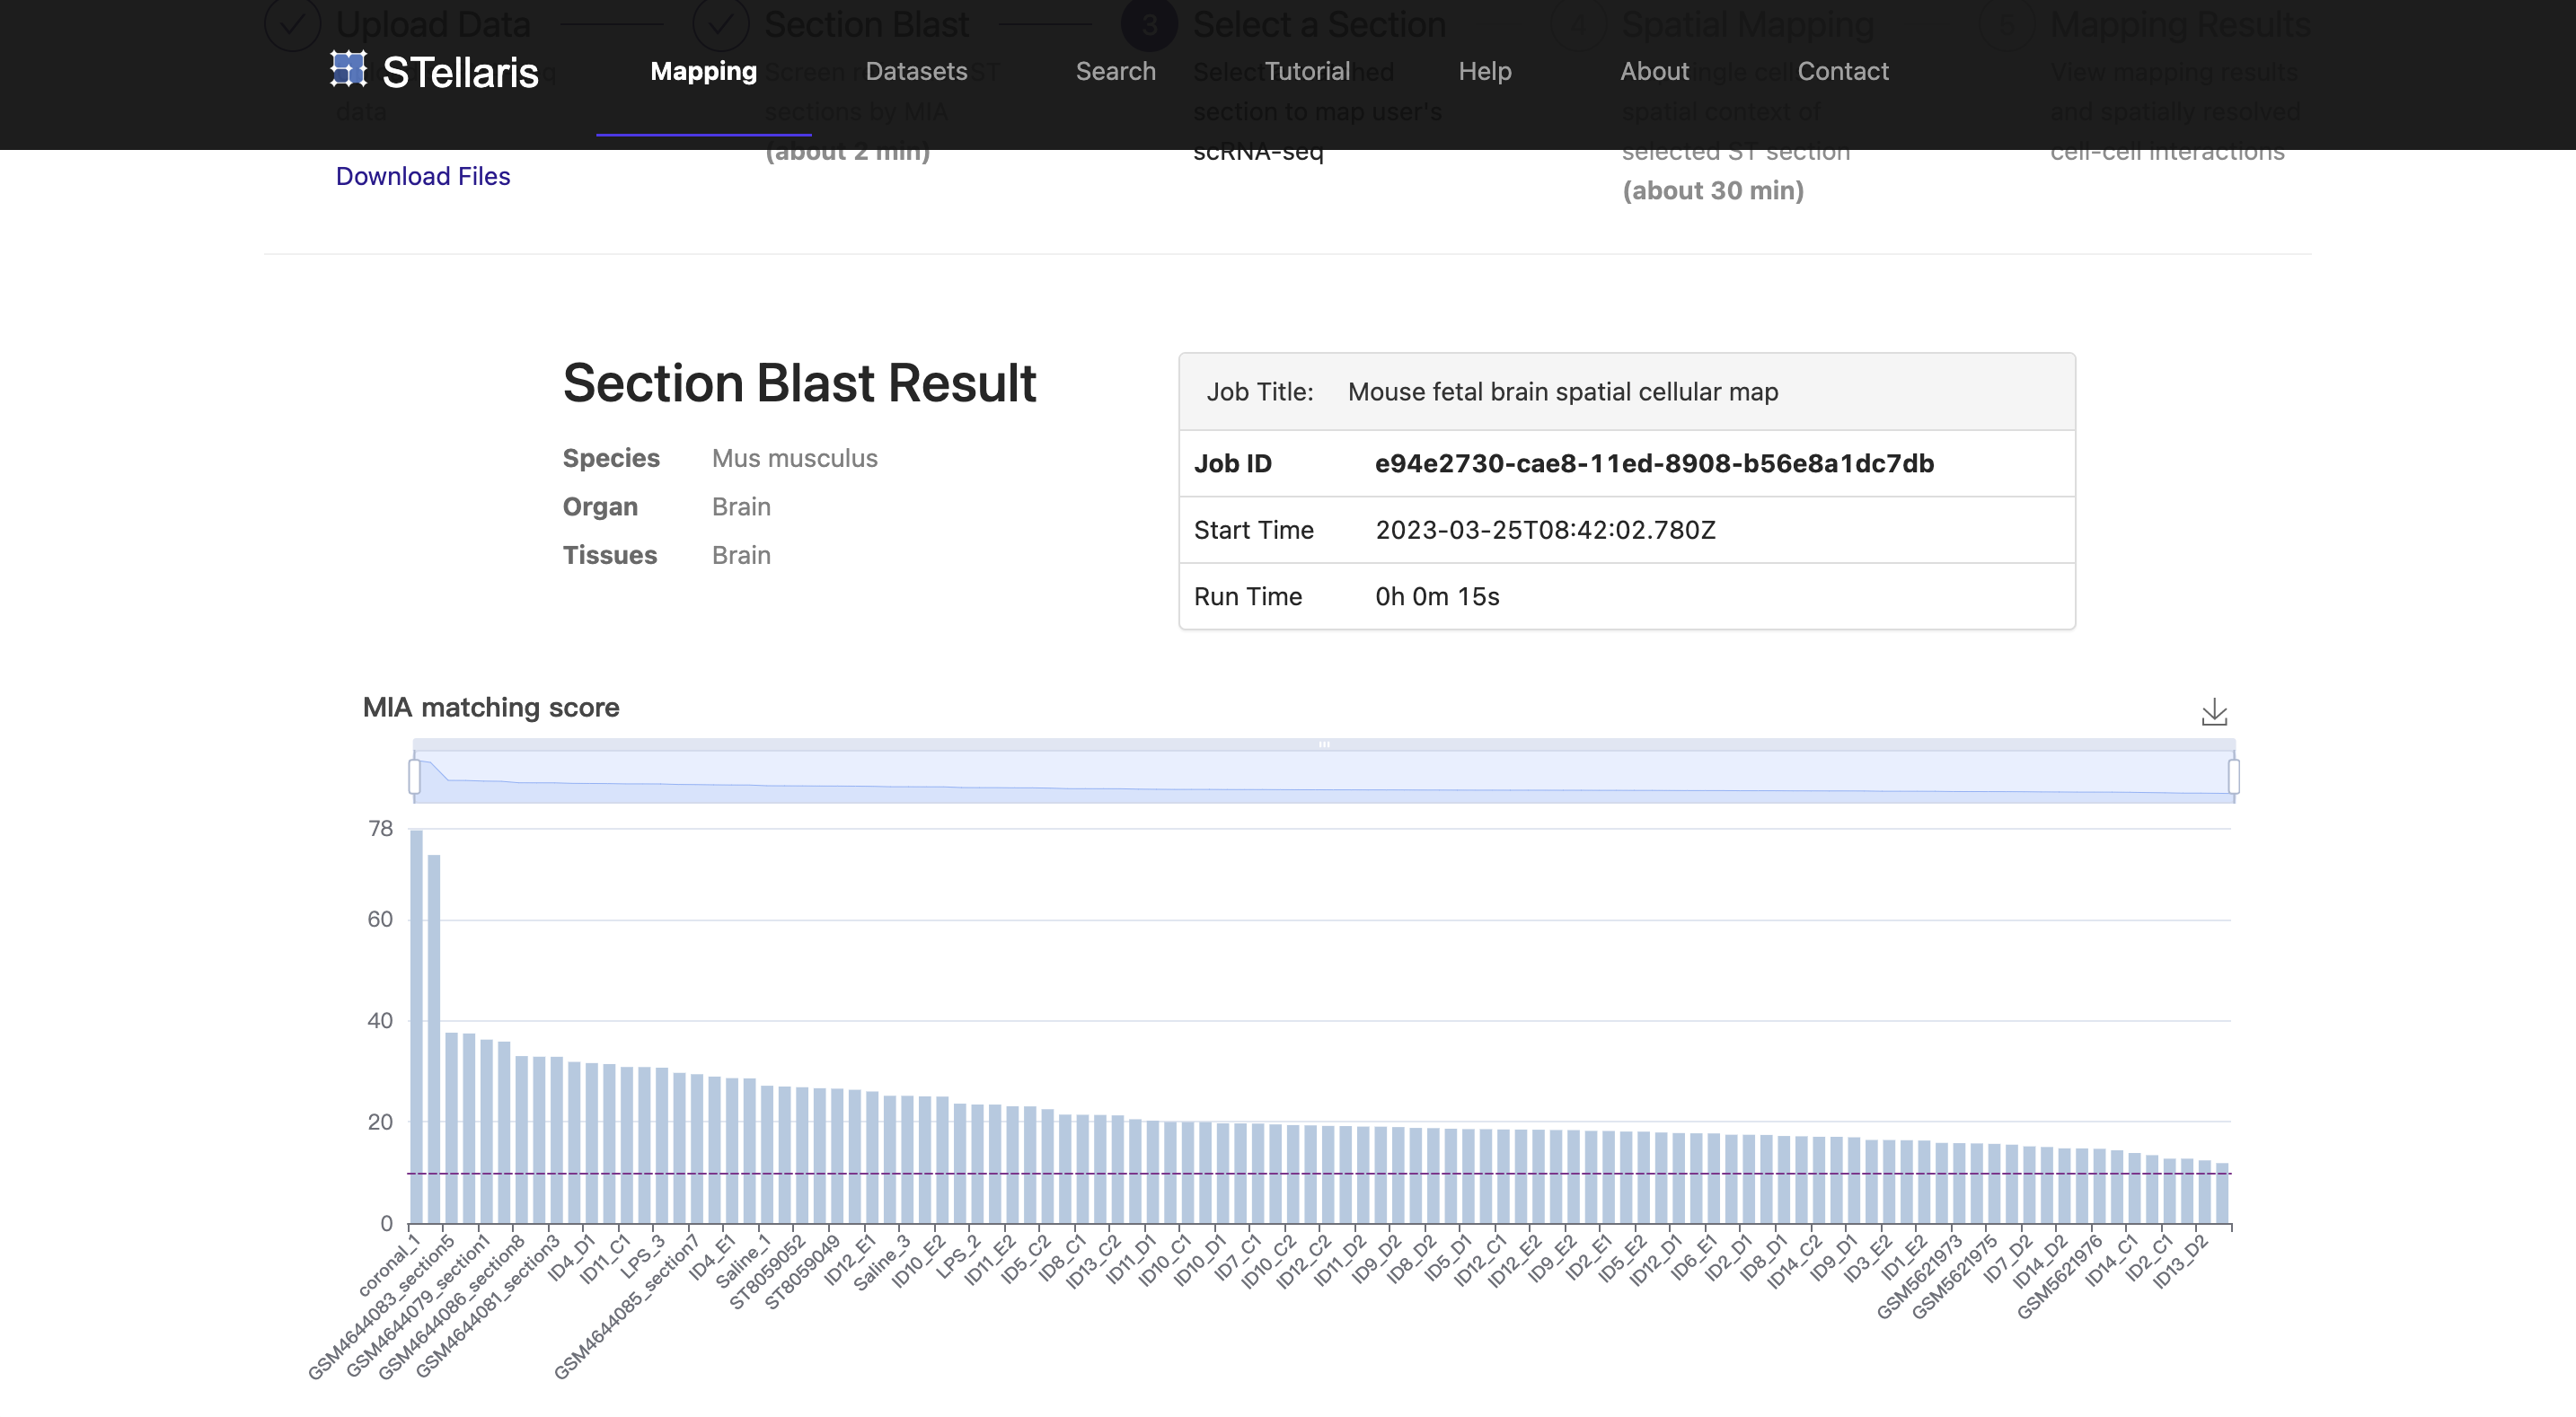
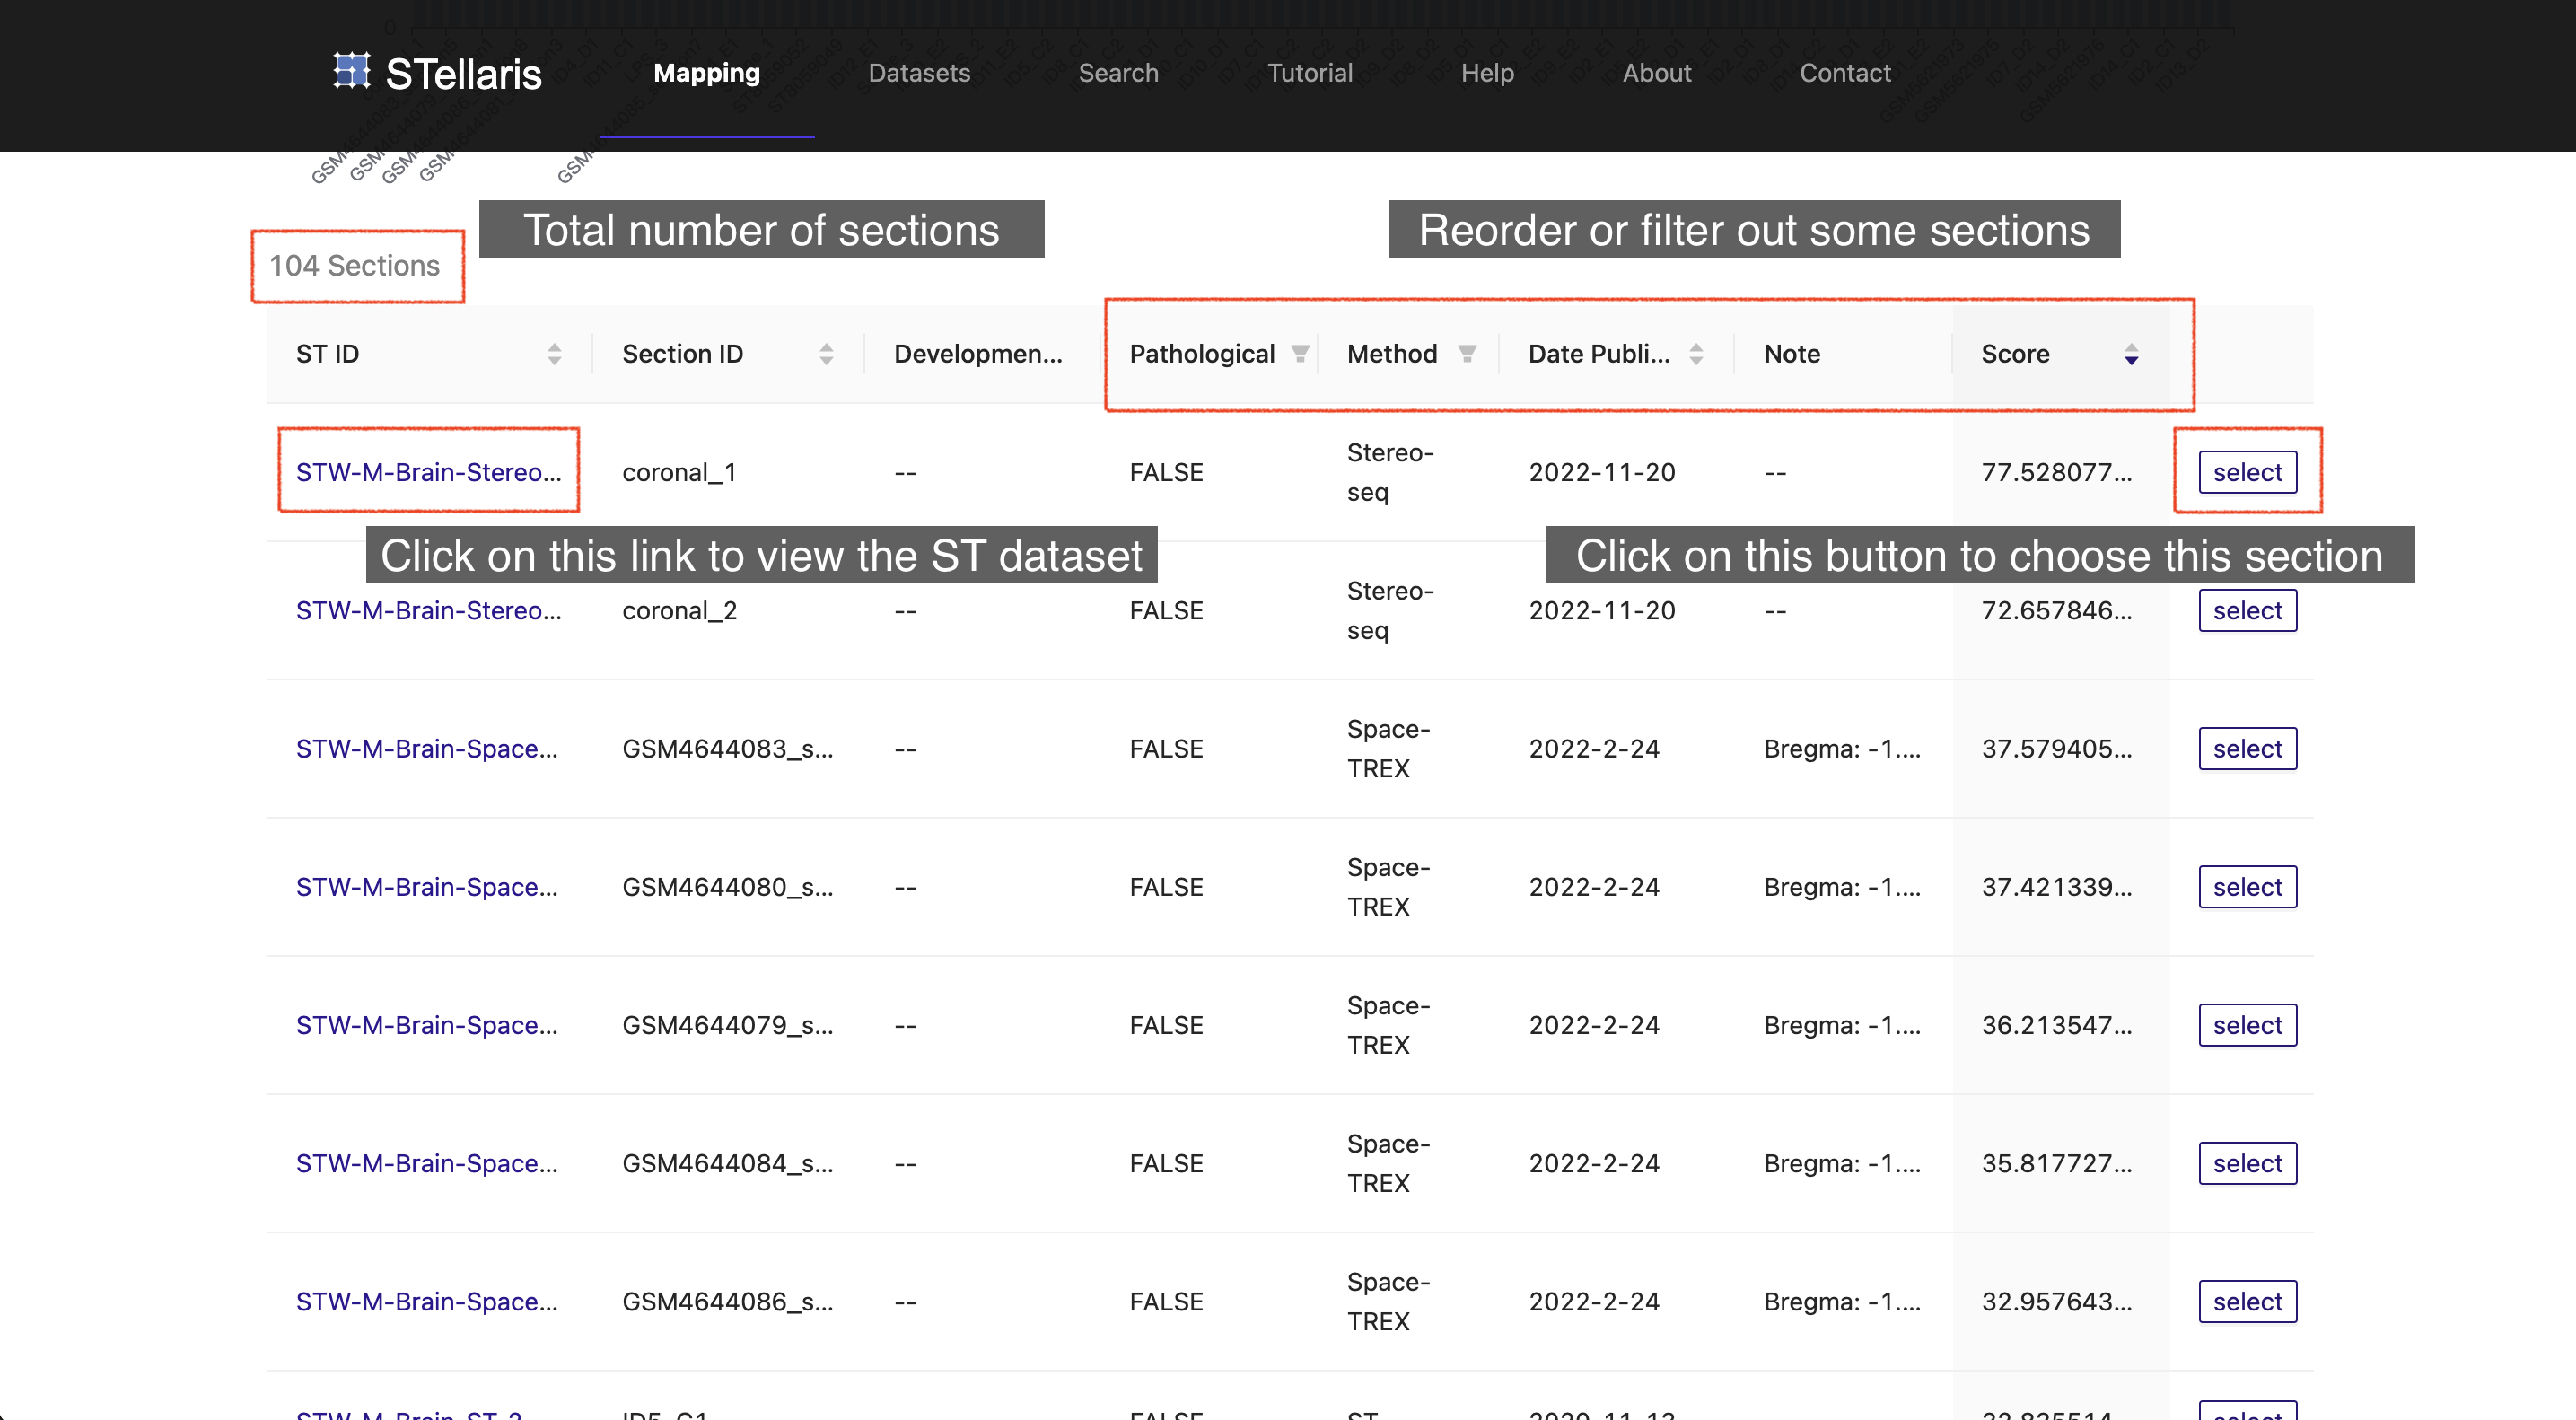
In this example, we select the top-ranked ST section that was derived from the coronal plane of the E14.5 embryonic mouse brain, which was generated using Stereo-seq in this study (STW-M-Brain-Stereo-seq-1 coronal_1). Notably, this section precisely matches the developmental stage of the uploaded scRNA-seq data, highlighting the feasibility of Section Blast.
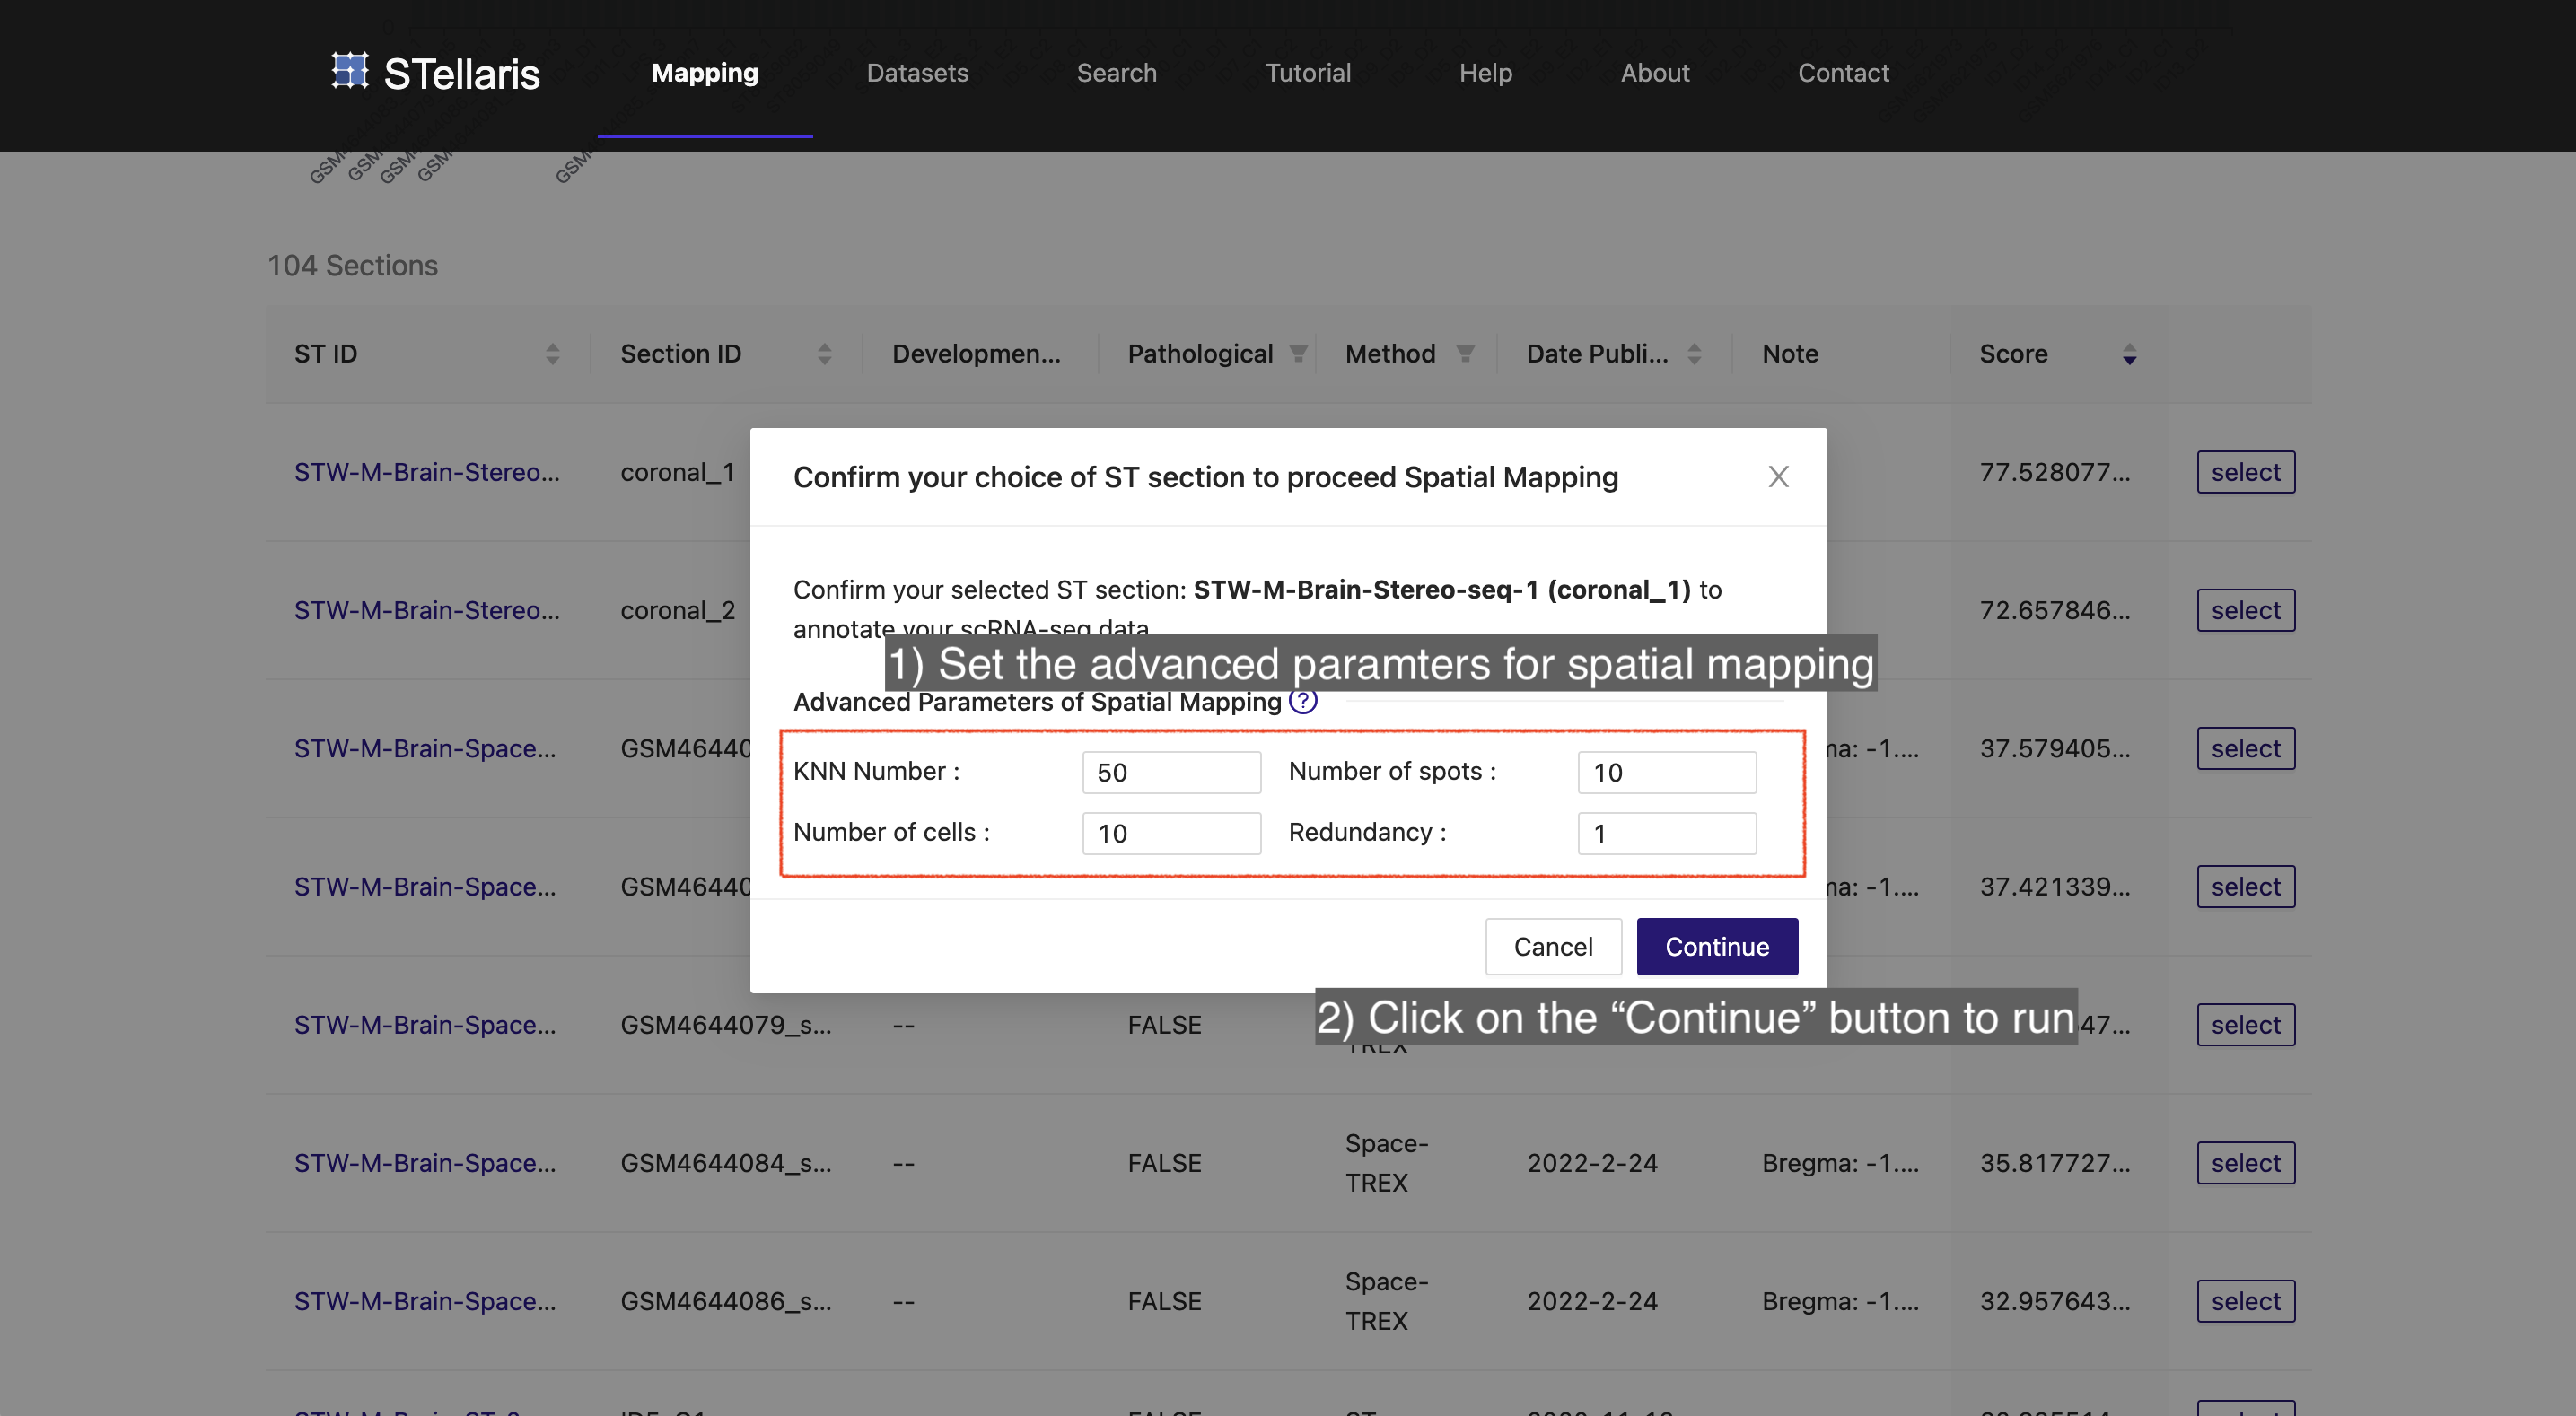
4. Spatial mapping
After clicking the "select" button, a confirming dialog will pop up allowing you to set the advanced parameters for spatial mapping. As the scRNA-seq data is sufficient in number (10,932 cells), we restrict the "redundancy" parameter to 1 and keep other parameters as default. See here for the description of the advanced parameters. Click the "Continue" button to begin the spatial mapping process, which will redirect you to a running page.
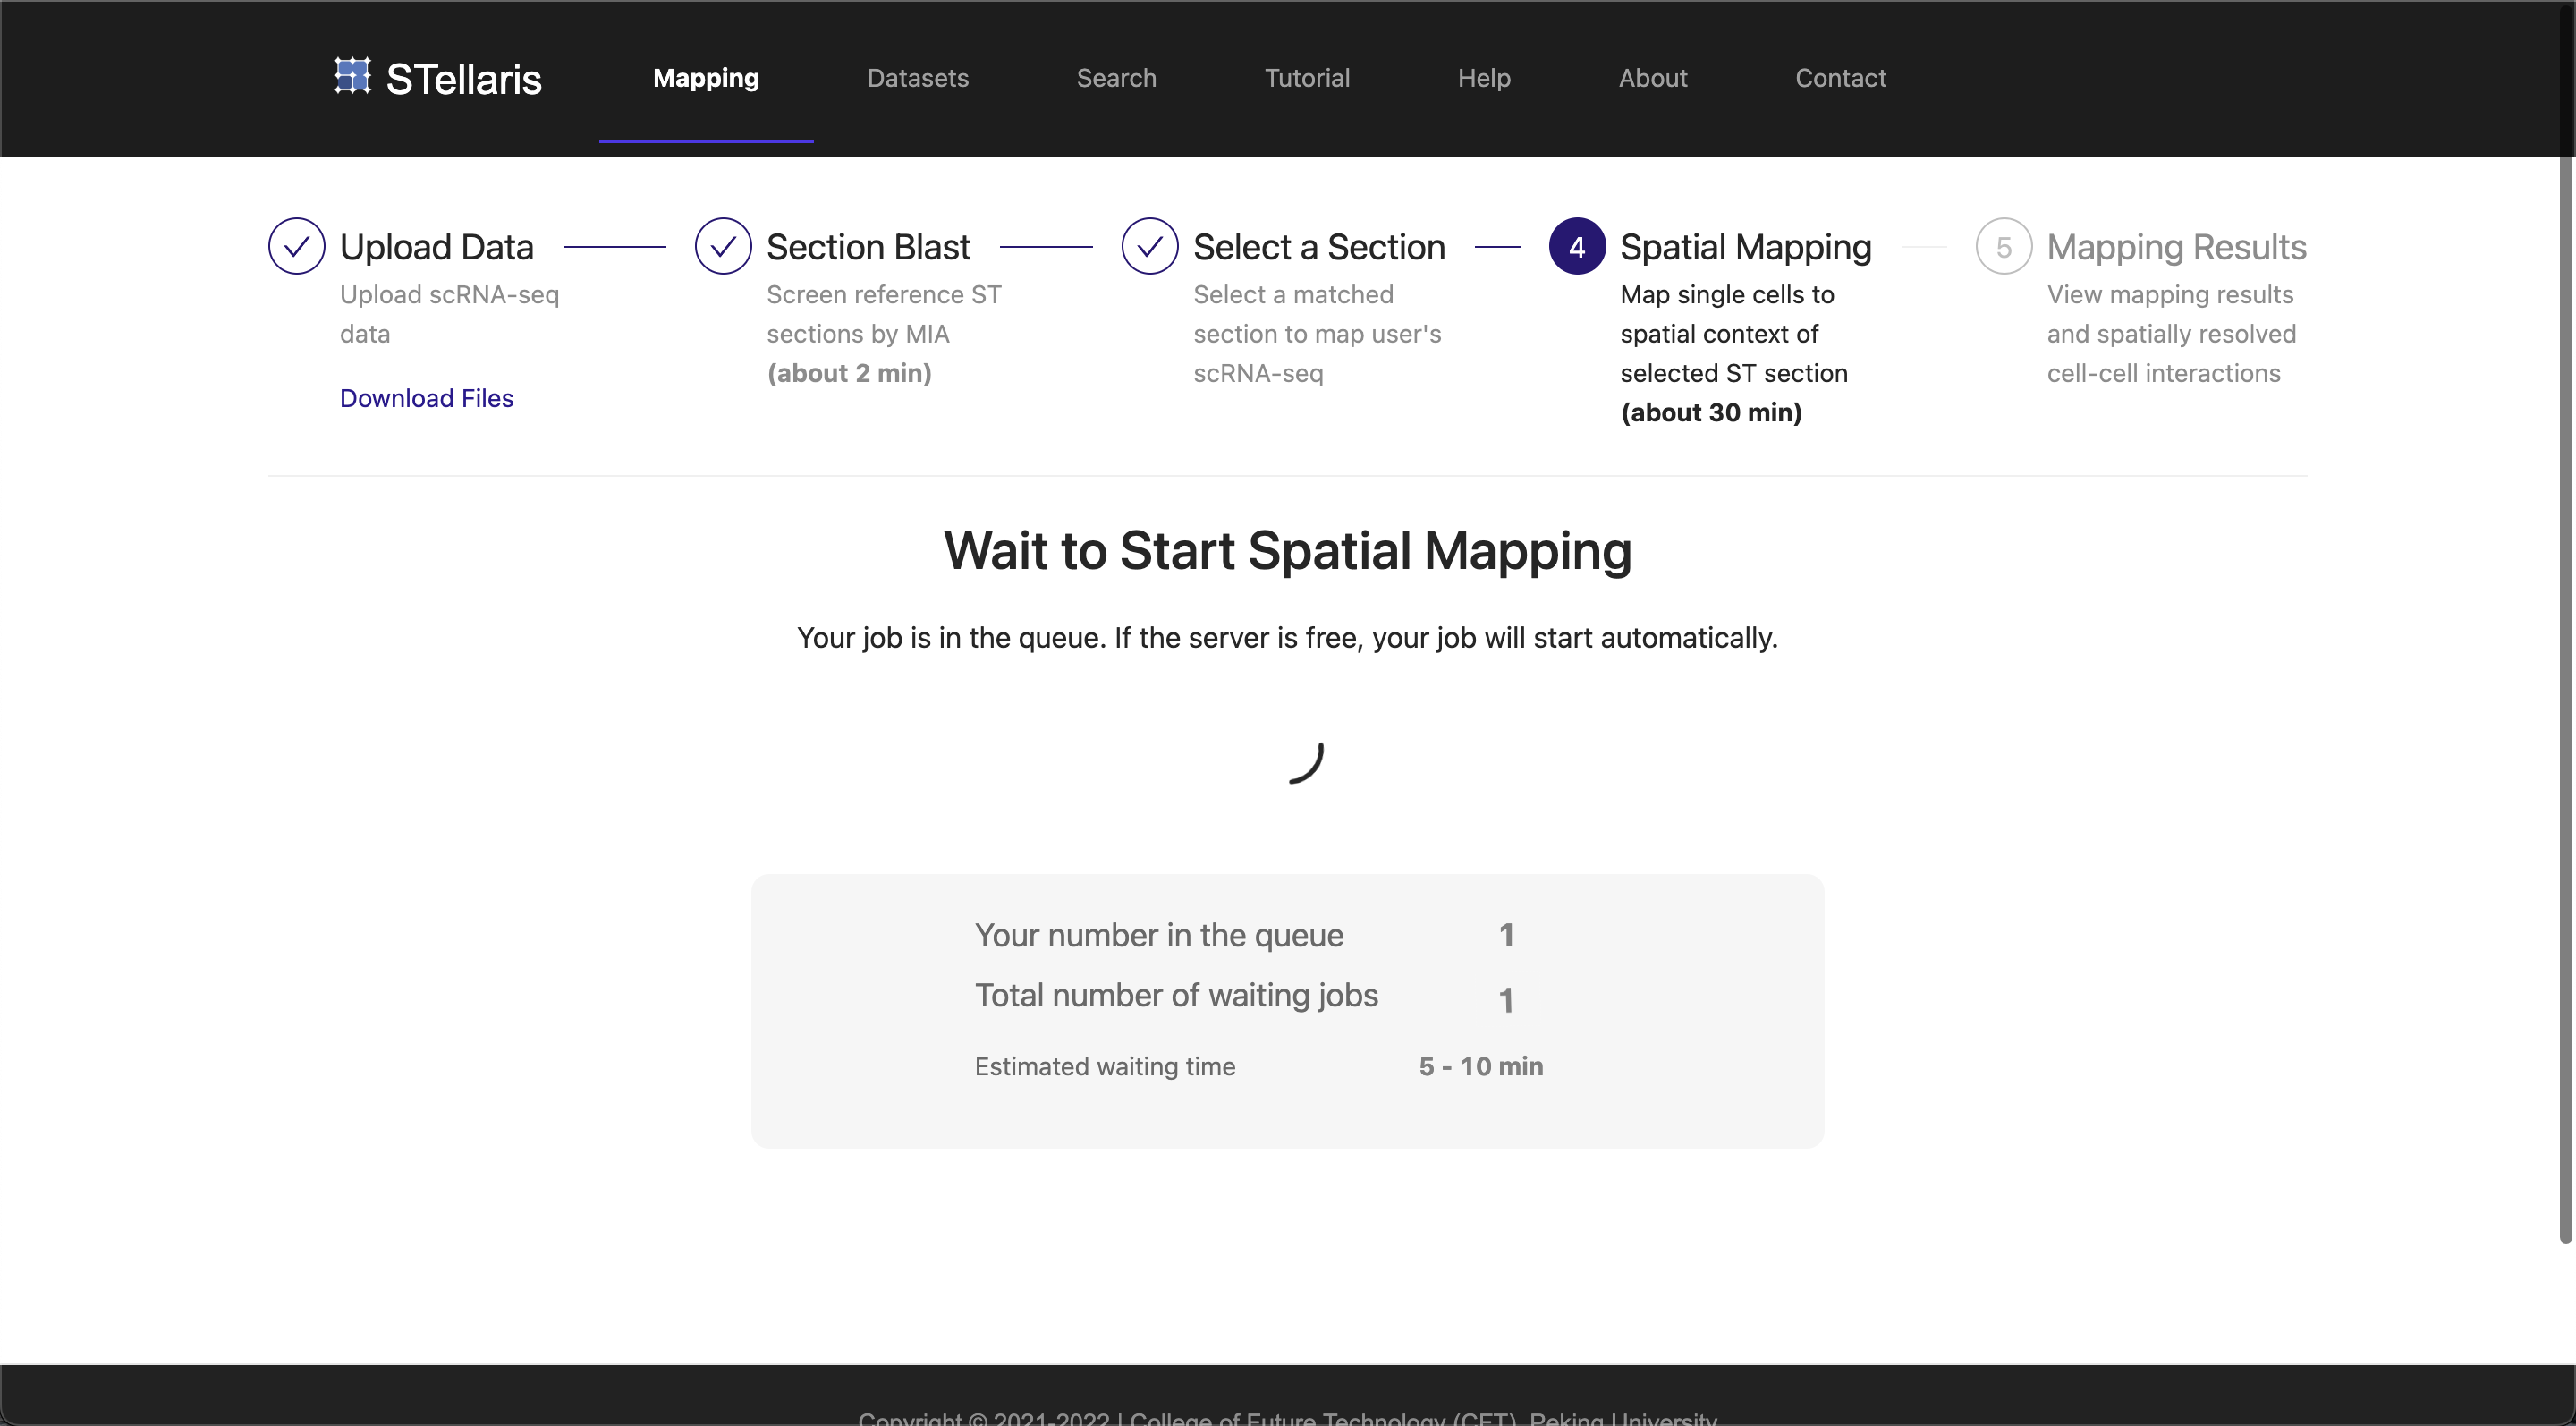
Note that if the server is busy, your job will be queued and started automatically when the server becomes available. Typically, the spatial mapping takes about 30 minutes for about 20,000 single cells. Please be patient, and you can leave the running page while the job is in progress, but remember to come back later.
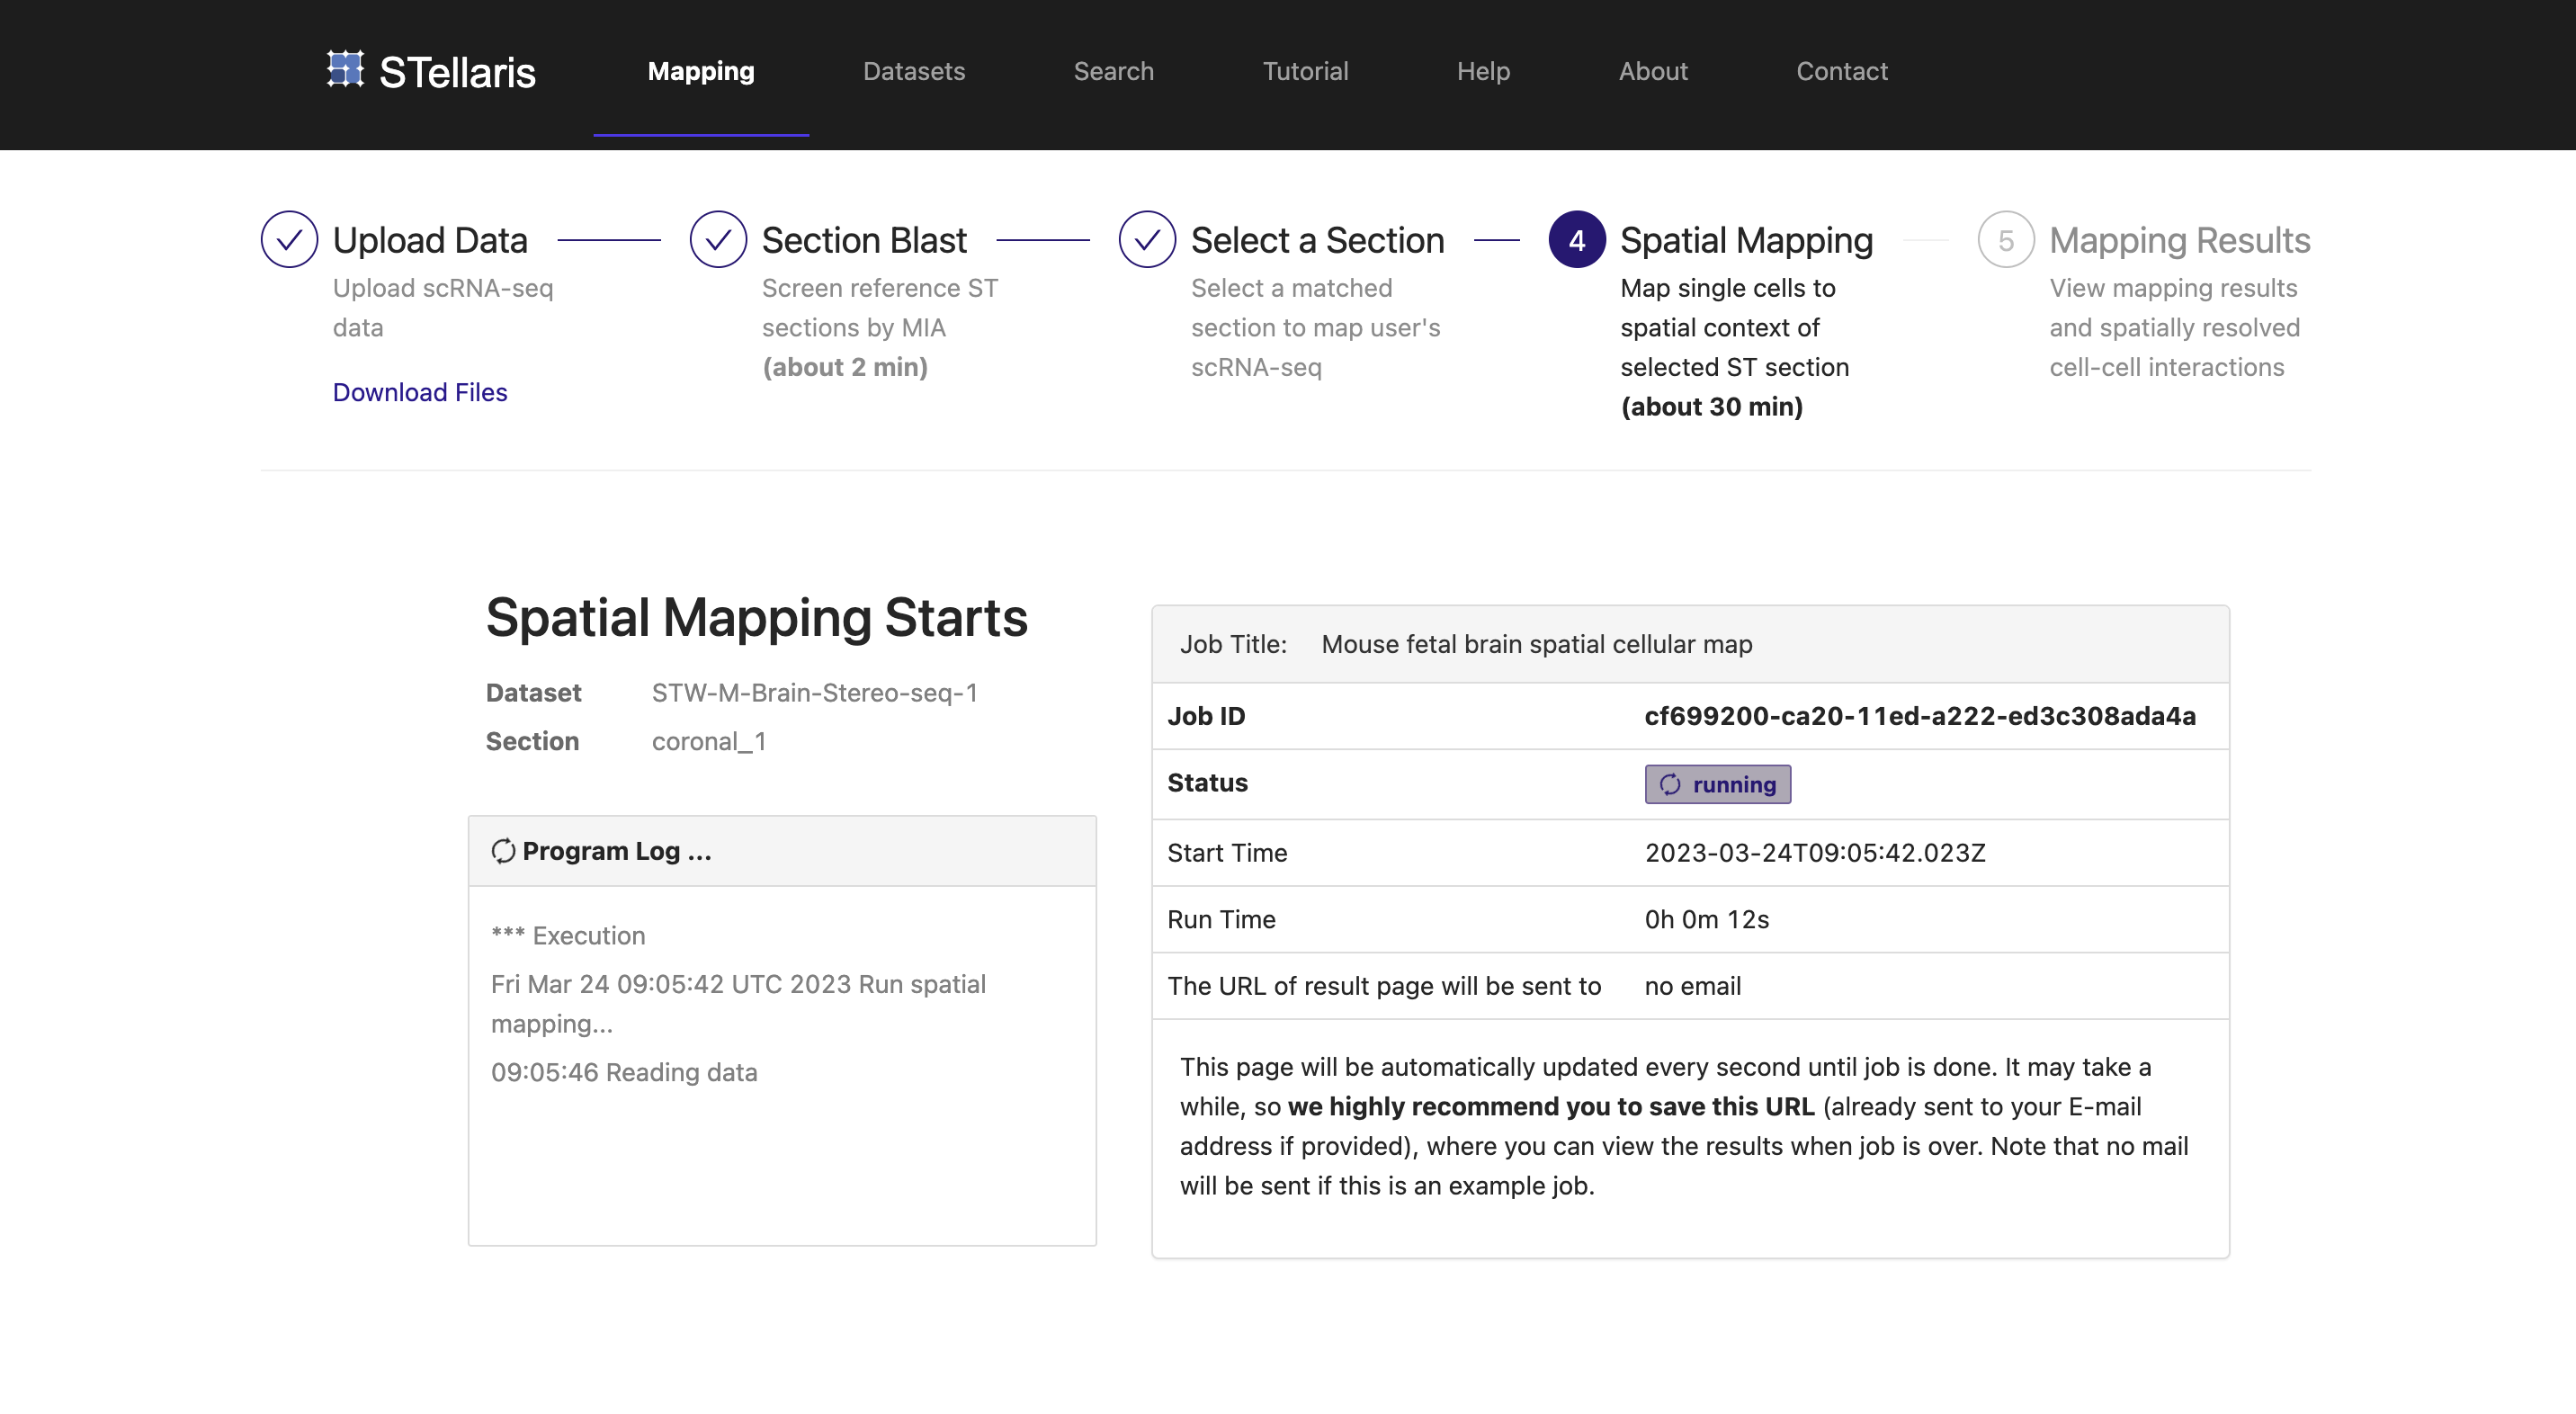
When the job is completed, you will be automatically redirected to the result page of spatial mapping. The interpretation of spatial mapping results will be discussed using several case studies in the next tutorial "Result interpretation".